In the BEEP app, you can create collaboration groups to share your hives with others. You can give both viewing and editing rights to your group members.
- How to create a collaboration group
- Add your hives to an existing collaboration group
- View shared data
- Exit collaboration group
How to create a collaboration group
- Click on the + in the middle of the top bar of the BEEP app.

- Click on 'New collaboration group'

- Give the group a name, a description and choose a color
- Invite group members (note: use the e-mail with which they are registered in the BEEP app)
- Select the hives that you want to add to the collaboration group
- Assign 'administrator' rights if you want a group member to be able to invite and remove group members
- The people you invite will receive a notification in their e-mail inbox. If they have accepted to be a member of the group, you will receive an e-mail confirmation.
- Select which hives you want to share: 1 click = group members van view only, 2 clicks = group members can edit

Add your hives to an existing collaboration group
- Click on the settings icon next to the collaboration group that you have been invited to and click on 'Edit collaboration group'.

- In the section 'My shared hives', you can select which hives you would like to share with the group.

View shared data
- To view data shared in the group, click on 'View inspections' and find the hives for which you want to view inspections. If a hive is equipped with sensors, you can click on the sensor icon of that hive to view the measurement data.

Exit collaboration group
- If you want to exit the collaboration group, click on the settings icon next to the group name and click on 'Remove collaboration group'

How to delete users from the collaboration group
To remove a user from a collaboration group, please follow these steps:
1. Go to the settings of the collaboration group. Click on the grey icon next to the collaboration group name.

2. Select 'Edit collaboration group'.

3. In the section 'group members', go to the user you would like to remove and click on the red delete button.
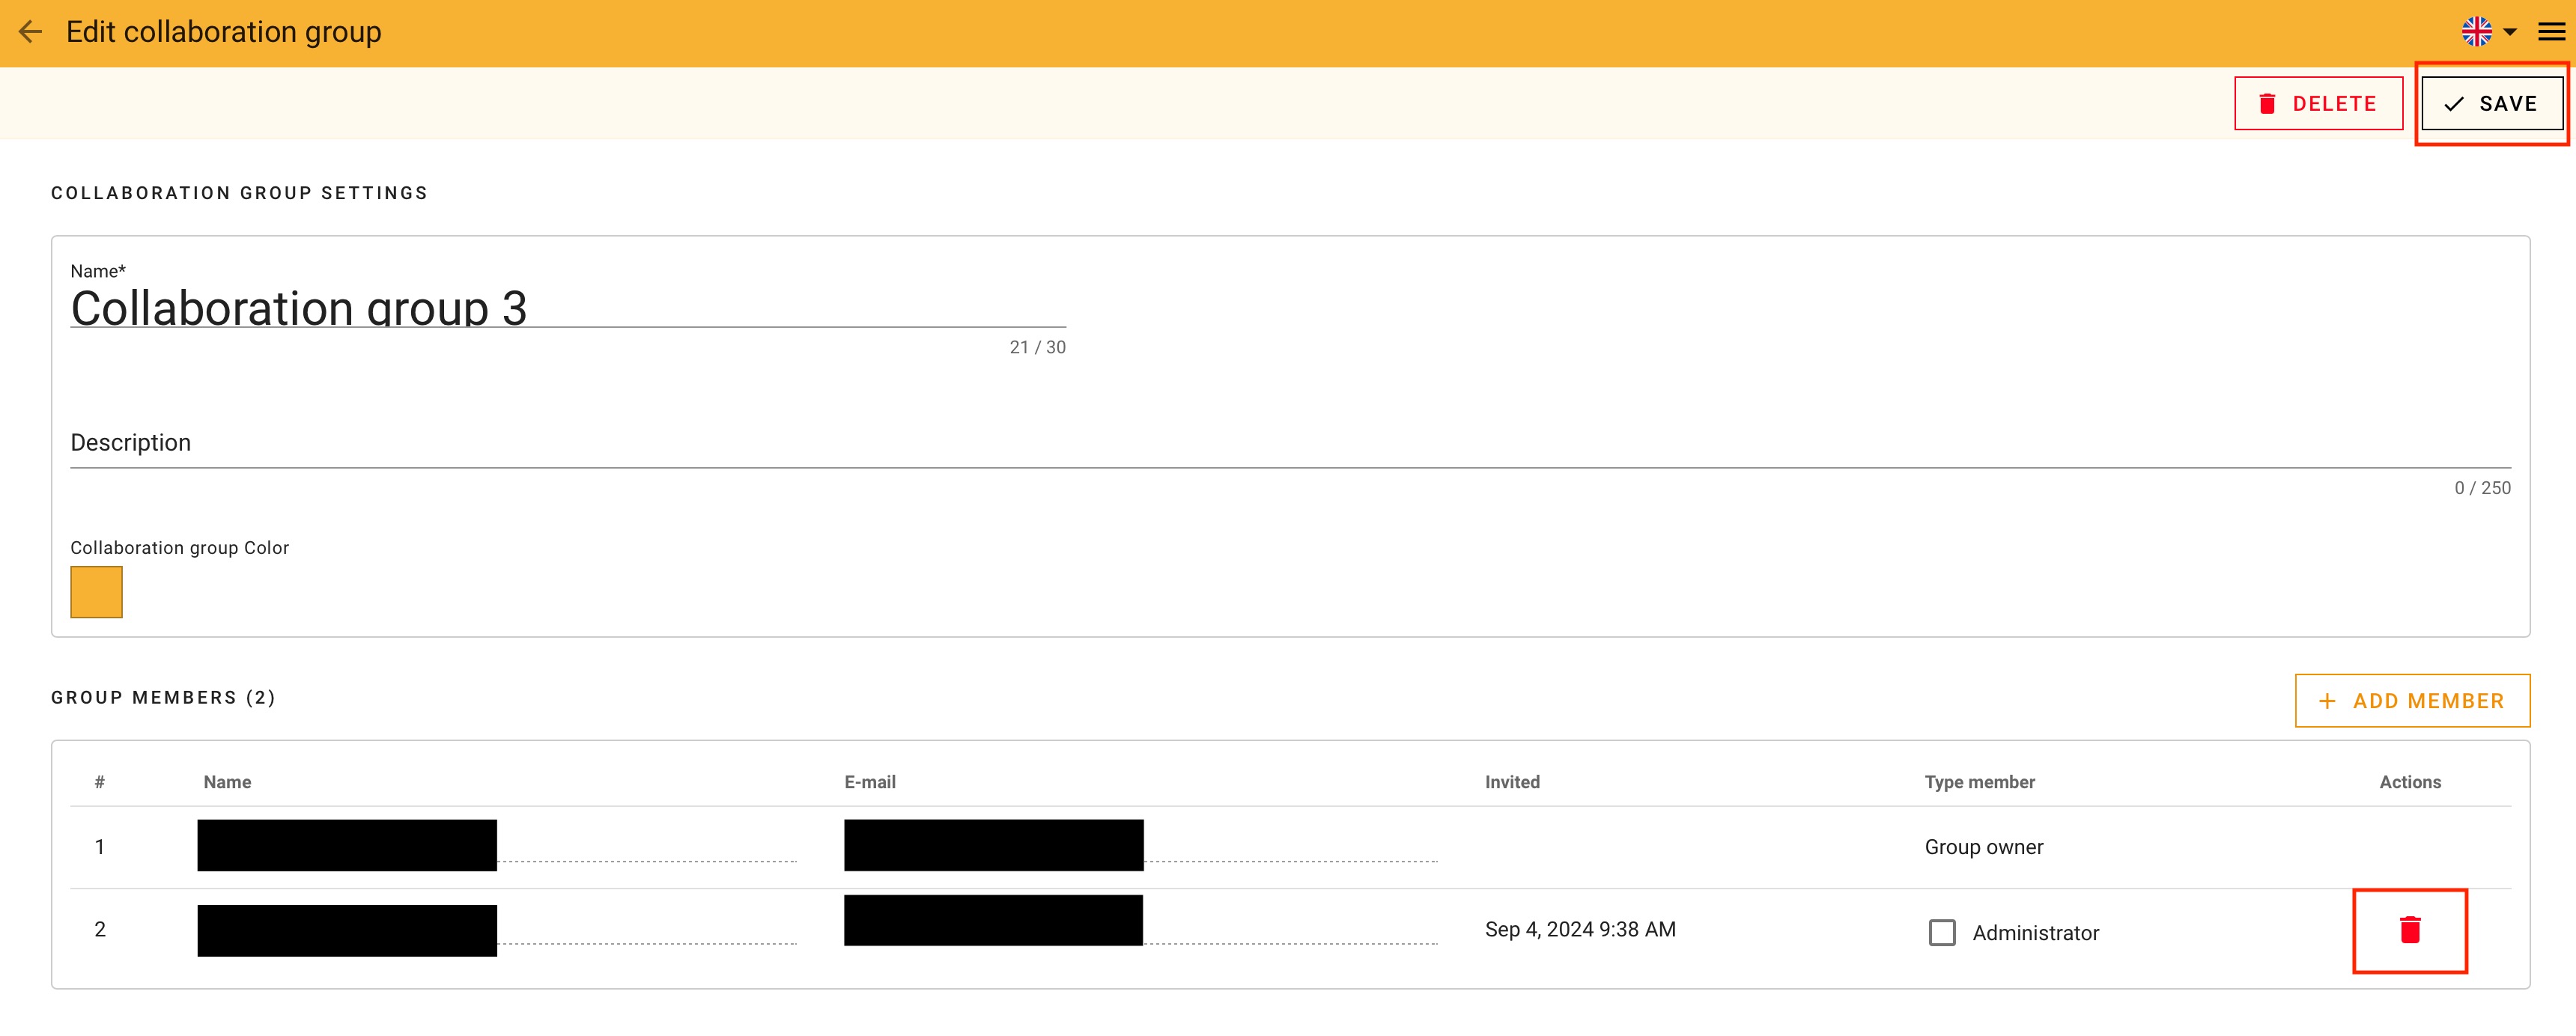
After clicking on the delete icon once, the user row colors red. Click on the delete button again to unselect the user.

4. Click on SAVE to save the changes you have made.